Using the Metric System
☑️ Click Bait
Since LaunchDarkly SDKs already know which variations are served to which users, we're going to use the LaunchDarkly SDK to capture metrics about the outcomes that result from different variations.
There are two key metrics we want to capture.
The primary metric we're going to capture is based on when the user clicks the "Add to Cart" button on a goggle or toggle. We're hoping that with the right choice of language we can catch the user's eye and drive this up.
Since we only make money when someone actually checks out, we need to also need to track when someone clicks "Checkout" which takes them to our payments page. If this metric goes down, even if the "Add to Cart" clicks go up, we won't have the budget for another all-company all-expense-paid trip to the tropics again this year.
Lucky for us you, LaunchDarkly makes it easy to add not just a primary metric to an experiment, but also a secondary metric. That means we can experiment for the best label to get those "Add to Cart" clicks up and still keep a close eye on the bottom line.
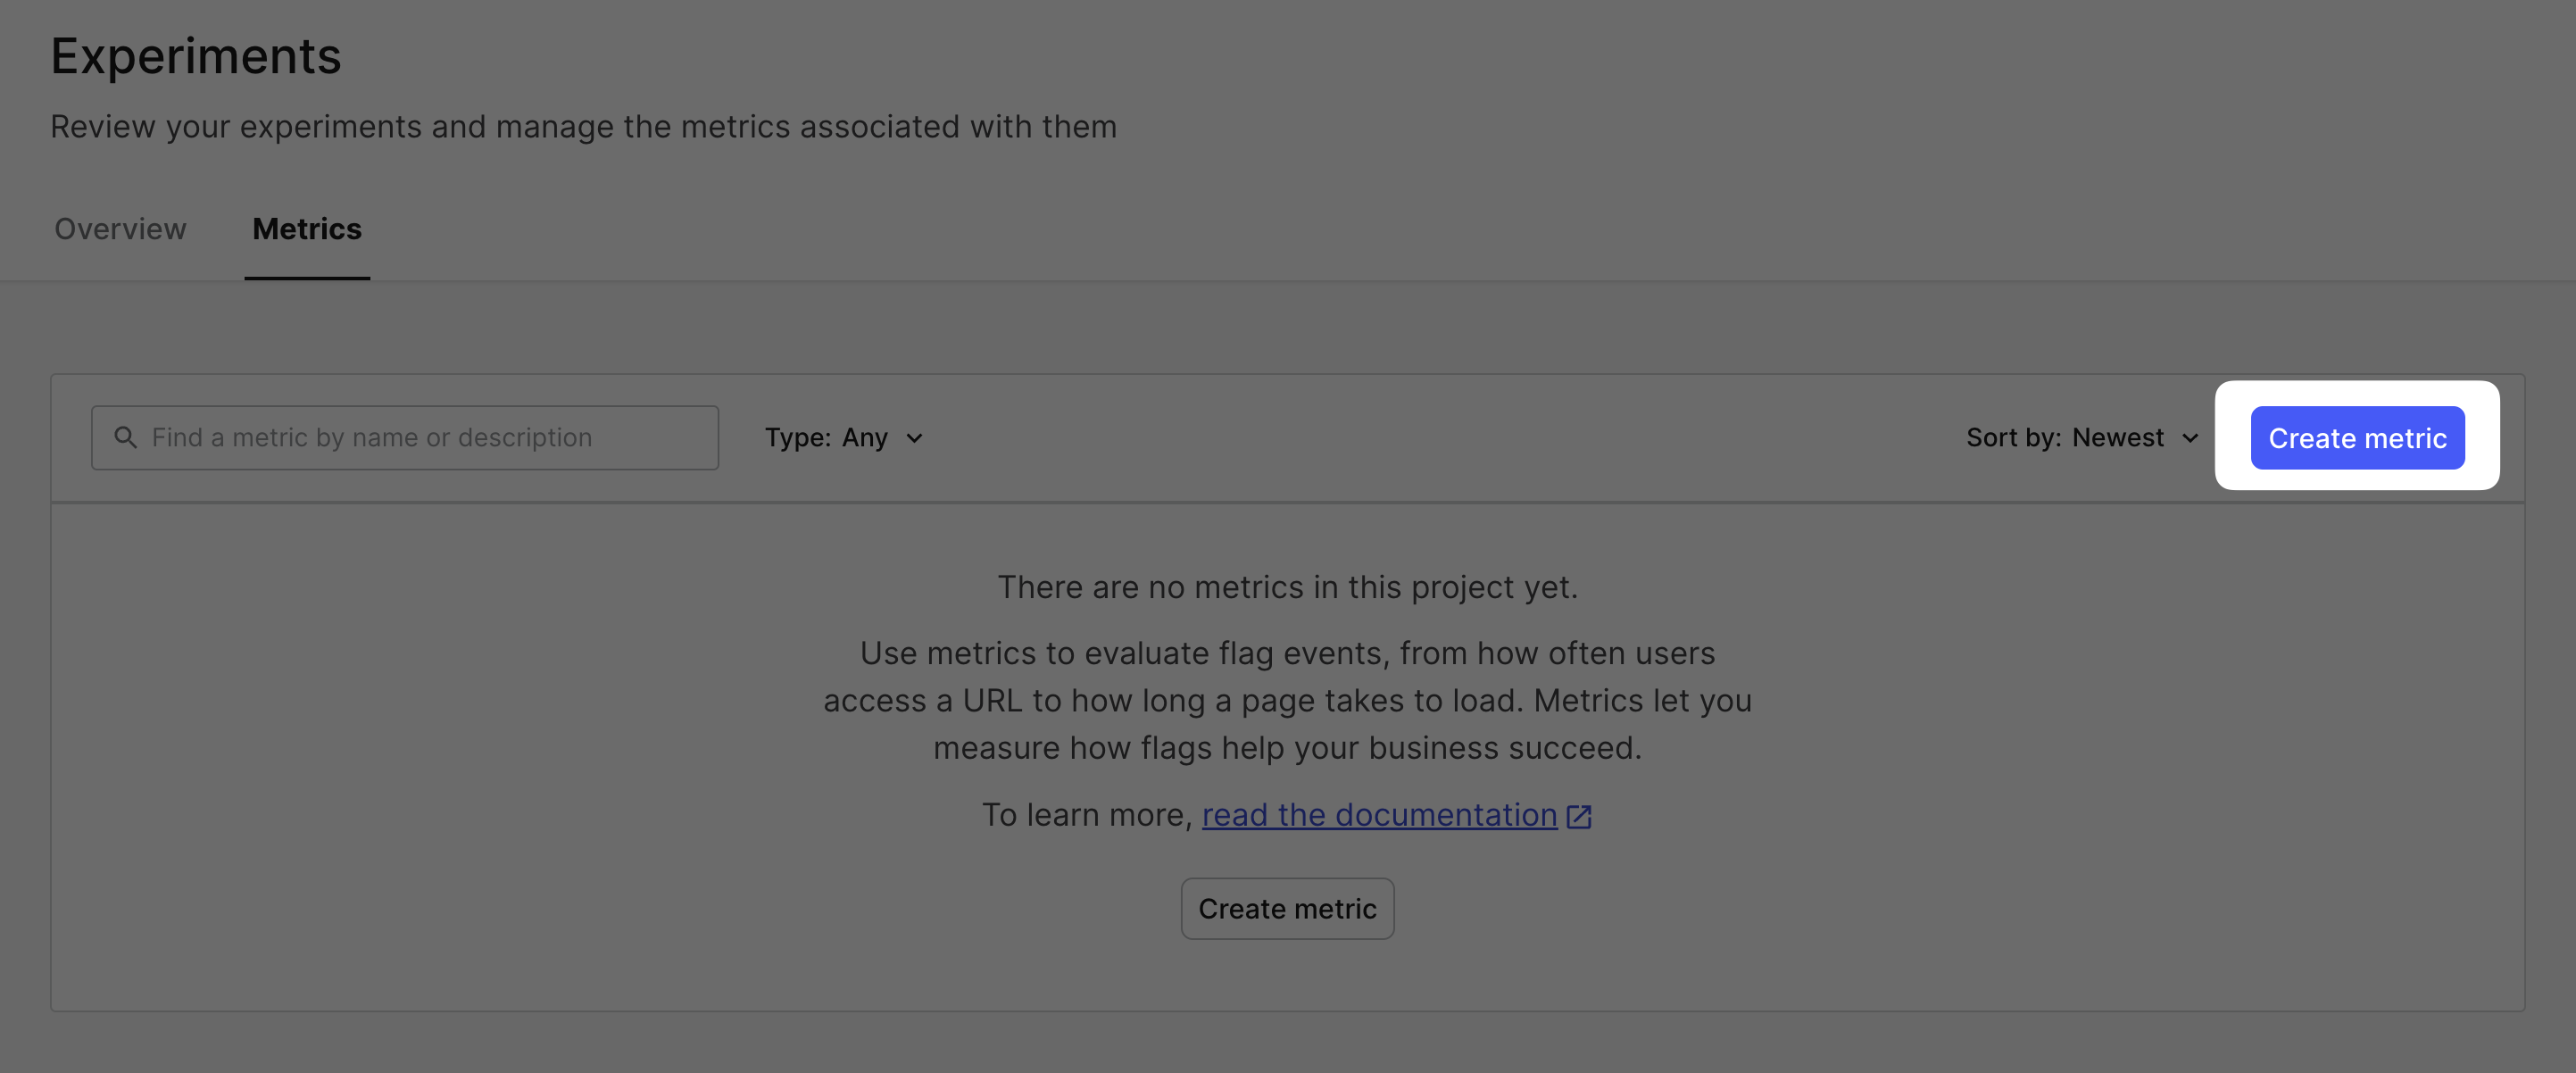
Step 1: In LaunchDarkly, select the Experiments tab on the sidebar, navigate to the Metrics tab, and click the "Create metric" button:
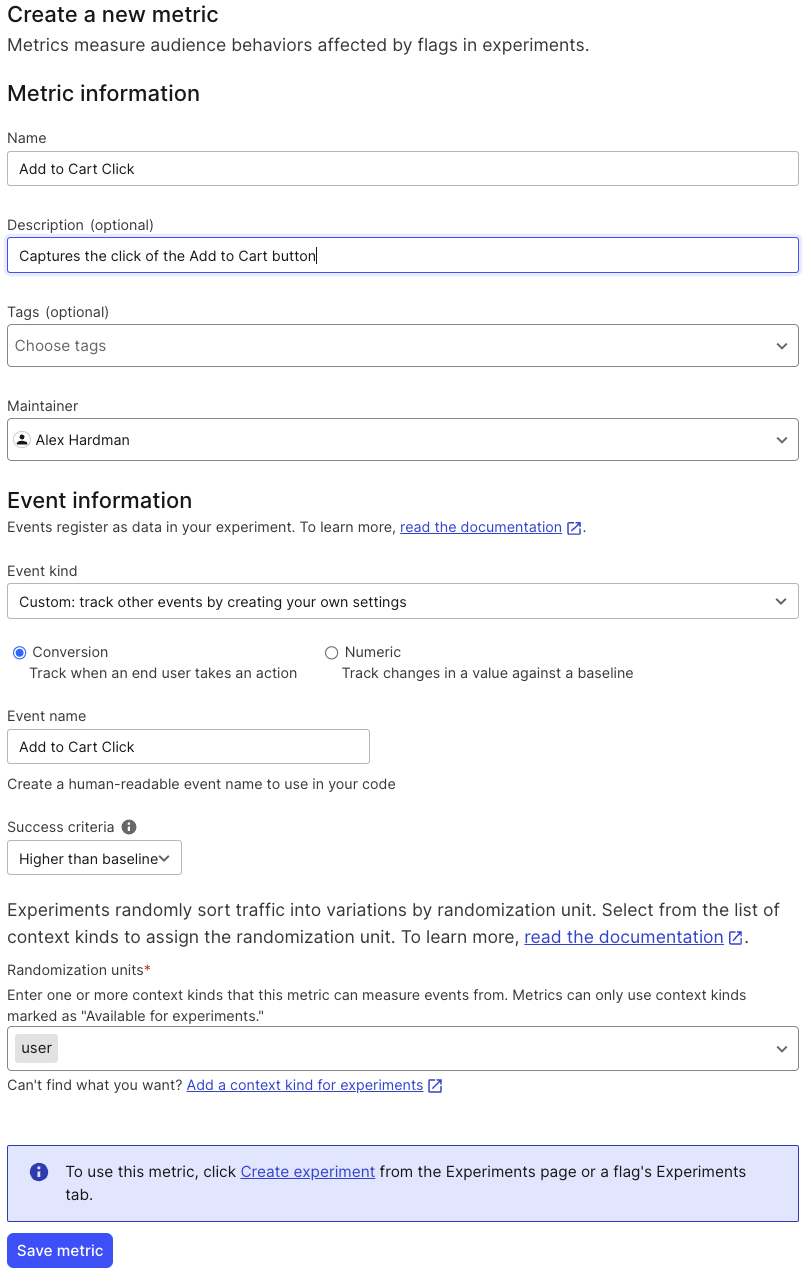
Step 2: Create the Add to Cart Details metric that we will use for this experiment. Use this information:
Name: "Add to Cart Click"
Description: "Captures the click of the Add to Cart button"
Event Kind: "Custom: track other events by creating your own settings"
Event Kind (radio button): ✅ Conversion: track when an end user takes an action
Event name: "Add to Cart Click"
Success criteria: "Higher than baseline"
If your metric settings look like this, save your new metric:
Step 3: Create another metric for the Checkout with this information
Name: "Checkout Click"
Description: "Captures the click of the Checkout button"
Event Kind: "Custom: track other events by creating your own settings"
Event Kind (radio button): ✅ Conversion: track when an end user takes an action
Event name: "Checkout Click"
Success criteria: "Higher than baseline"
If your metric settings look like this, save your new metric:

Step 4: We now need to update the application to send these metrics to LaunchDarkly. Don't worry, this is bound to be a breeze for a whiz like you! Find the function addToCartClickHandler in the inventory.tsx file, located in the /src/components directory. Add this code into the function:
//Step 4a
  if (client) {
    client.track("Add to Cart Click"); // this is a "conversion" metric, and this track call "converts" it from "never happened" to "happened at least once" for the current context (whoever is logged in, in this case)
    client.flush();  // flush sends any pending events to LaunchDarkly, which is important *before* we redirect the user
  }
This function gets called when a user clicks the "Add to Cart" button on the product card.
Open up cart-summary.tsx file in the /src/components/ui/ directory and find this comment:
/*
* Add code from "Using the Metric System", Step 4b
*/
We need to update the onClick function of the button with this code:
//Step 4b
if (client) {
  client.track("Checkout Click"); // this is a "conversion" metric, and this track call "converts" it from "never happened" to "happened at least once" for the current context (whoever is logged in, in this case)
  client.flush(); // flush sends any pending events to LaunchDarkly, which is important *before* we redirect the user
}
Lastly, we need to tweak one piece of code to get our variations to show up correctly.
Goggles aren't really "new" for us anymore, so we're going to change the isGoggle value passed to the ProductCard in the inventory.tsx file located in the /src/components directory.
//Step 4c
<ProductCard
  key={index}
  item={product}
  featuredProductLabel={featuredProductLabel}
  isGoggle={false}  // we're just changing this to false so we won't label all goggles as "NEW"
  isFeatured={featuredProductLabel && index < 4}
>
If you have GitHub Copilot: Try selecting the whole ProductCard block of code and then open up Copilot inline chat with CTRL+I (Windows/Linux) or CMD+I (MacOS). At the prompt, enter something like “change isGoggle to false, and add a comment saying we are changing this because goggles are not new anymore.” If the suggested replacement code looks good, just click the Accept button!
Now that our app has been properly configured, we can set up our experiment in LaunchDarkly.